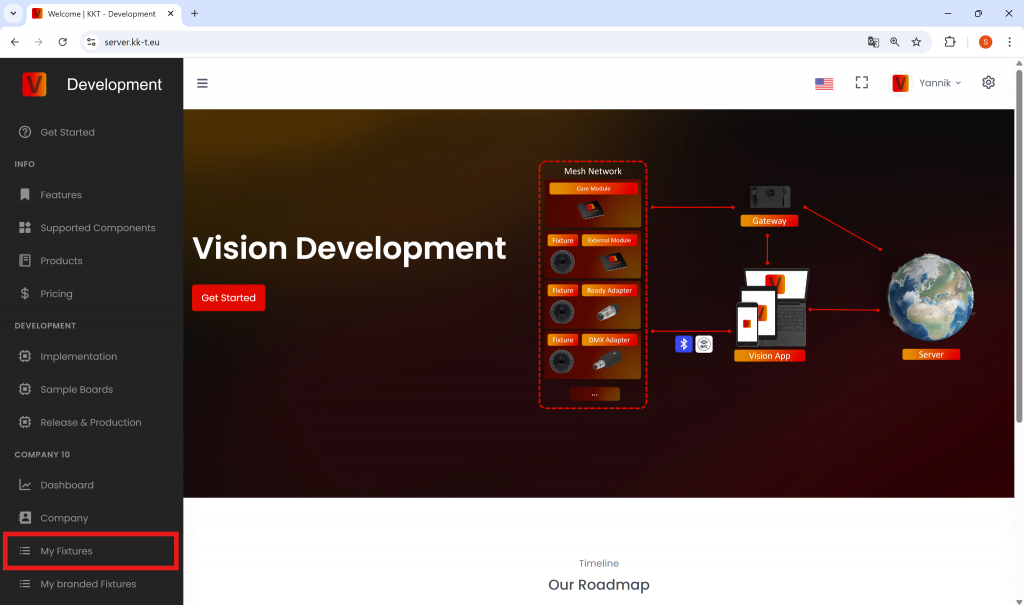
Login the Vision Web Service: https://server.kk-t.eu/
Before creating a fixture let me introduce you to our concept. If you are a manufacturer who brands your fixtures for one or more customer please read this carefully:
RDM Manufacturer ID in combination with the Device Model ID is crucial for detecting the specific type of fixtures. We do not allow to change them after a release of a fixture. Changing would mean that possible fixture on the field would stop working because they don’t get recognized anymore. So especially these 2 values should stay the same over lifetime of the product. Of course, descriptions, images, website urls and names can be changed.
Often the first fixtures will be used to show the customer how it works. Afterwards it gets customized for their needs.
A good workflow for creating fixtures is the following:
- Create a fixture in your company and your naming scheme. That means also in your RDM Manufacturer and Device Model ID. This is the fixture you can use for showing your customers. In order that the end user cannot detect your fixture there is a setting which can hide the fixture in the app for end users. This is standard on hide.
- When the customer likes the product and buys it you can create another fixture using your customers naming scheme, RDM Manufacturer and Device Model ID. With the same or other pictures for example. This fixture can then be also linked to their Account that they can have an overlook over the collected data from the field and some more information.
Create Fixture
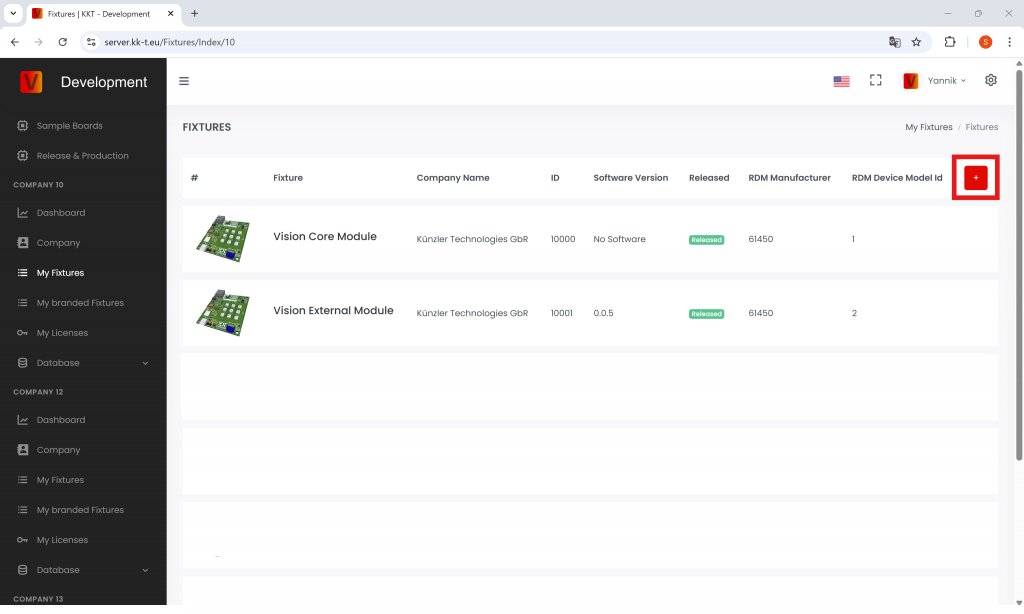
- Naviagte to „My Fixtures“:
2. Click the red “+” Icon in the top right to create a new fixture:
3. Fill in all the required information (see detailed description below):
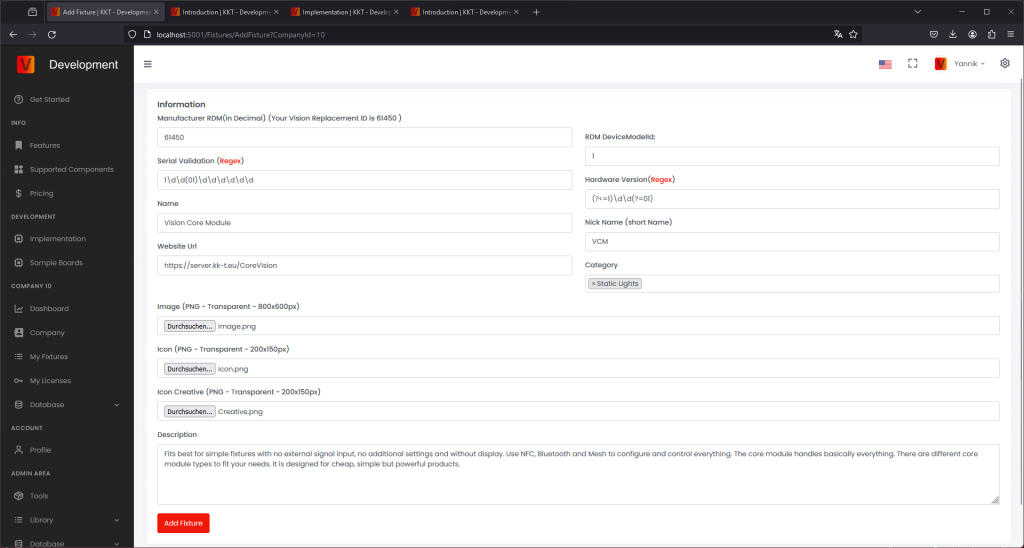
- RDM ESTA Manufacturer ID
You need to convert the number from Hex in Decimal
If you are not an RDM Manufacturer you can use your personal Vision Replacement Id and a RDM Device Model Id. This combination can only exists once on the whole server. If there are problems contact us. - RDM Device Model ID
You need to convert the number from Hex in Decimal - Serial number Validation
Enter the regex for the serial number validation. If you do not have further specifications it is: \d\d\d\d\d\d\d\d\d
Serial Validation is used to Verify Server uploads and prevent errors. - Hardware Version
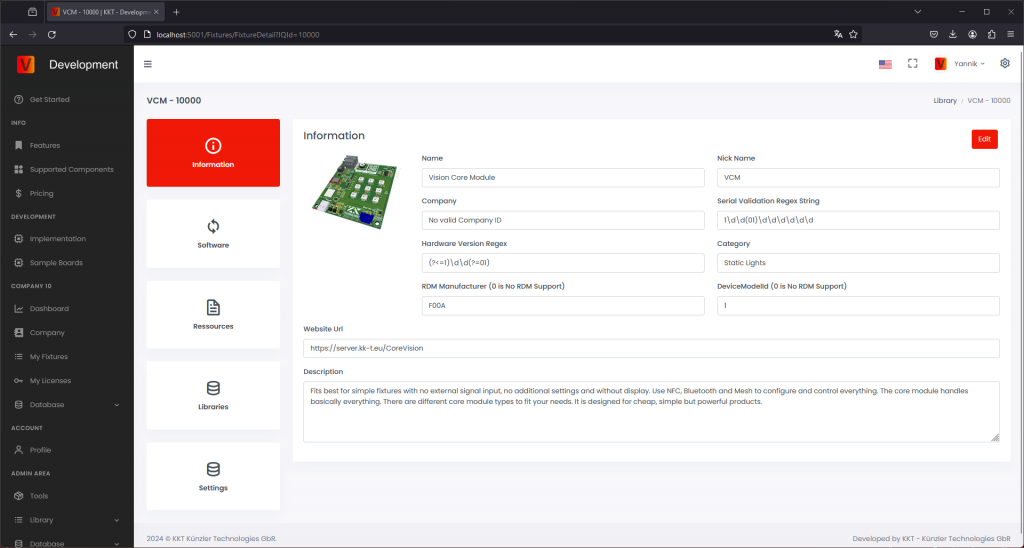
This is optional so you do not need to fill it out. If you want to enter the regex for the hardware Version. With the hardware version in the serial number there can be different configuration for the same fixture. Test your regex strings on the links. - Fixture Name
- Fixture Nick Name
This is a shorter Version of the fixture name. If the fixture name is already short you can enter the fixture name as well - Representative Manufacture name
You can enter your company name. Exept if this fixture is baranded for another company then you have to add the name of the company who will sell this fixture to the end-user - Representative fixture website Url
- Category
- Image
-Format 800x600px
-Make sure the background is transparent
-The fixture must not have any light output
-Make sure that on the left and right side is a safety margin of at least 12% this is equal to at least 96px - Icon
-This is the same as the image just with a lower resolution
-Format 200x150px
-Make sure the background is transparent
-The fixture must not have any light output
-Make sure that on the left and right side is a safety margin of at least 12% this is equal to at least 24px - Icon Creative
-Format 200x150px
-Make sure the background is transparent
-The fixture must not have any light output
-The creative Icon is white were the fixture can light up so you need to provide an image were the lighting area of a fixture is white with a transparency of around 60 percent. See the example for a better understanding.
-The Icon Creative is used to define the illumination area in the icon so the app can handle the lighting correctly. If your device does not have any light output component, you can upload a fully transparent image. - Description
Shot description of fixture
4. Click “Add fixture” to add it to the library
5. After adding the fixture it will displayed on the My Fixtures Page. Every fixture will get a unique ID and will be created as Draft (not released).
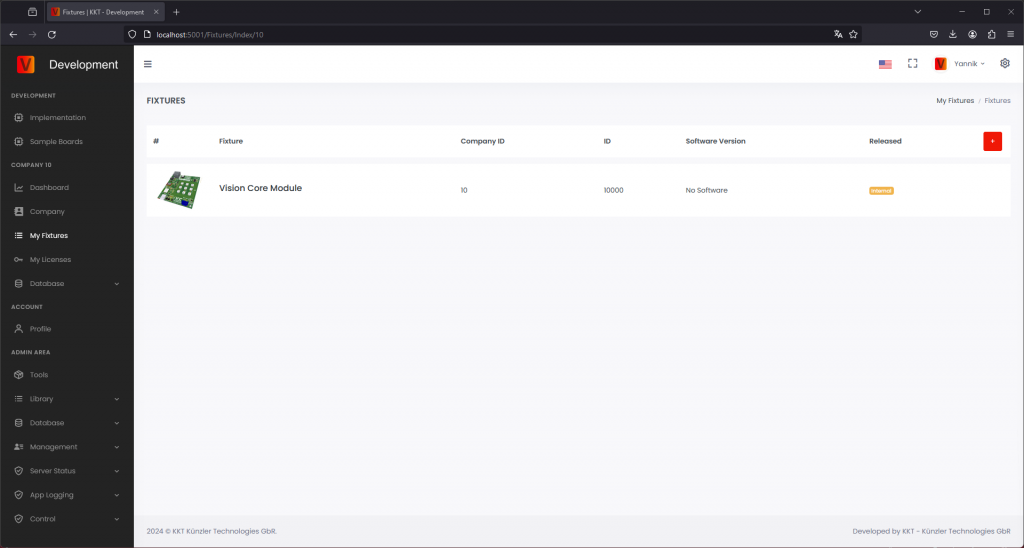
Click on the fixture to manage it properly. You can see all configurations on this page and do general changes on the edit button.
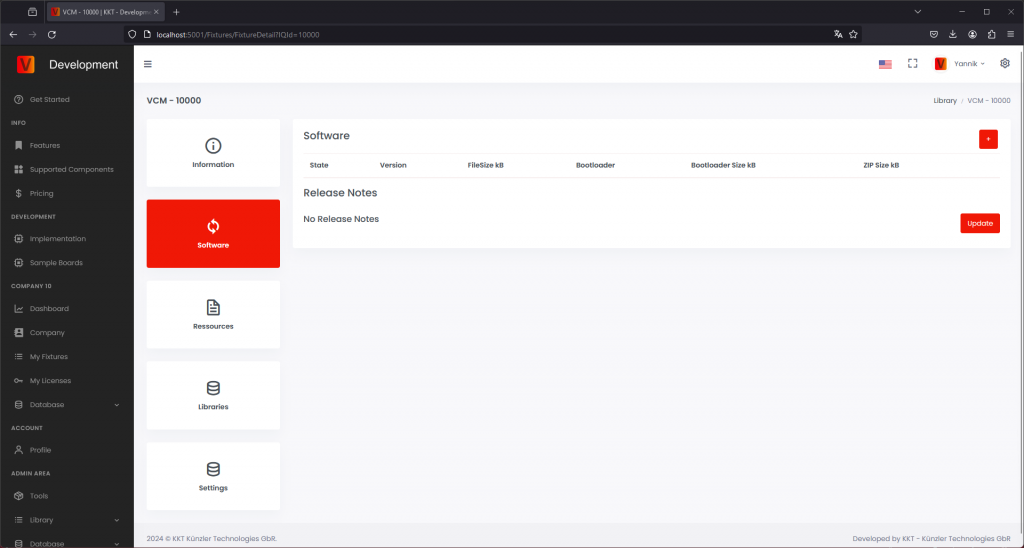
The second area is not used for Core fixtures because the Firmware is linked together with the Vision Controller firmware.
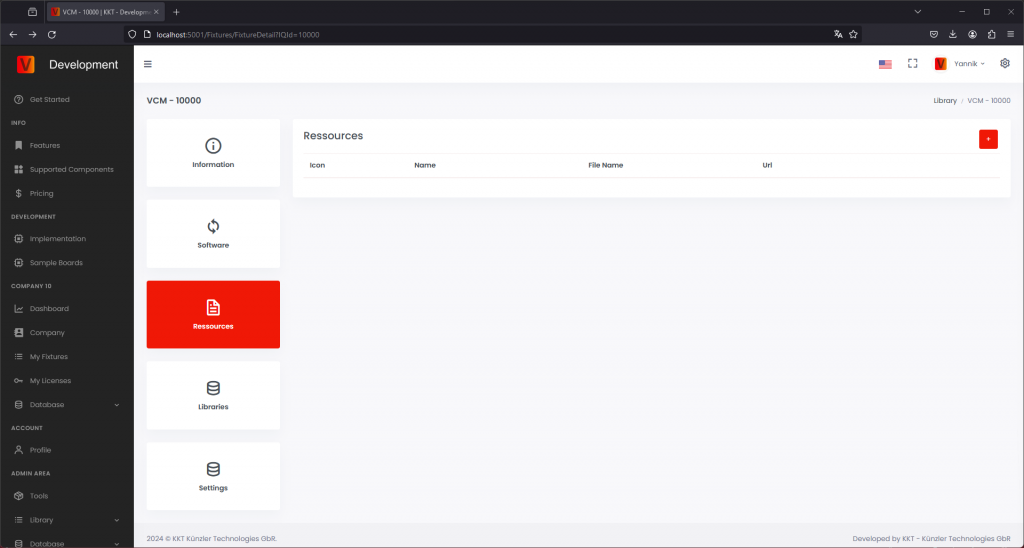
Upload Resources
In the third area you can upload and manage ressources/documents for your fixture. This can be manuals, dmx sheets, technical specifications and so on.
Upload Libraries
In the fourth area you configure the creative config you created for your fixture in the Test & Run – App Control Chapter. Upload this configuration here.
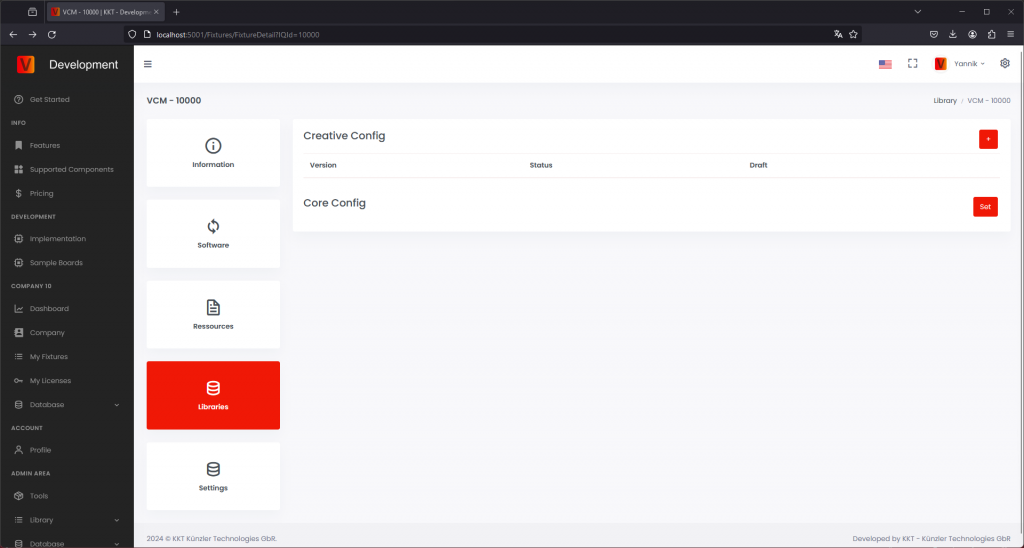
Clicking on the add button brings you to the add page. Choose the Software Version number the config should fit. If you only need one config set it to 0.0.0. Using Core Fixtures there is just one creative Config useful because there is no additional firmware version.
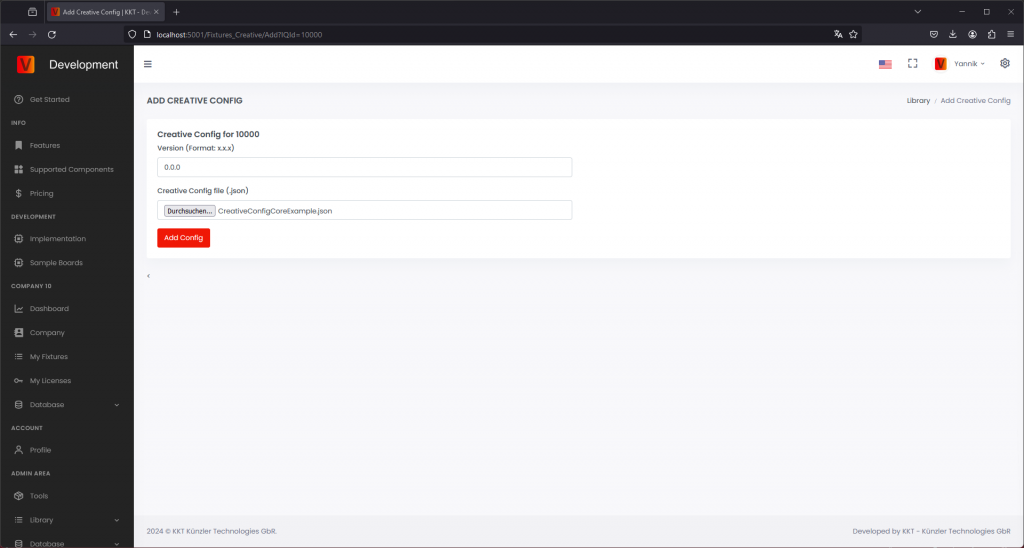
After adding the configs, they will be displayed. They will be added as draft first and are not visible to your users. Click on Draft to release them.
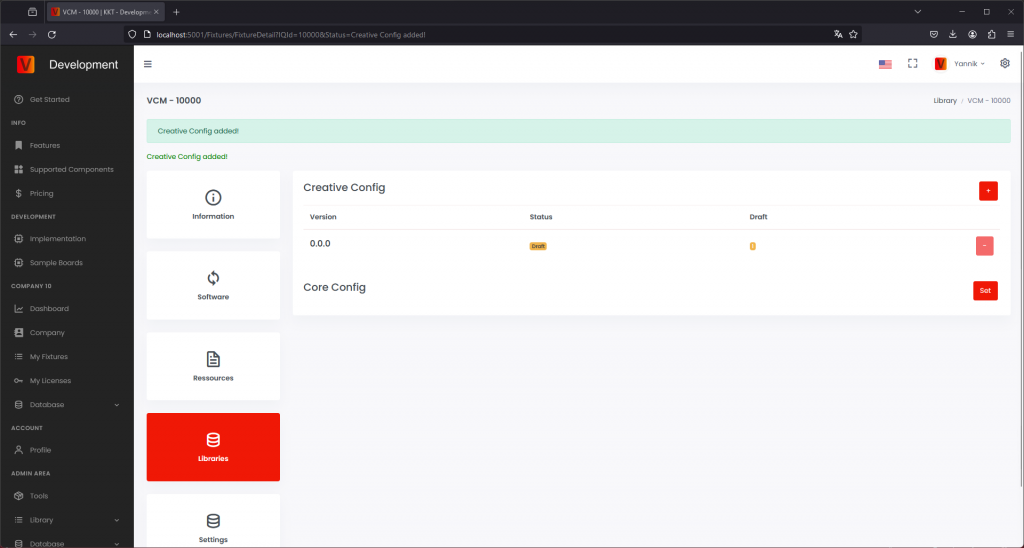
Click on the set button to set your core configuration.
Interface: Choose your desired interface
Battery Charger: Choose your supported Battery Charger
Batter Gauge: Choose your supported Battery Gauge
Put in the battery information if a battery is available.
Put in the power draw of your LED per Pixel.
Select your Input Switch Type.
Select Your supported Interface Types.
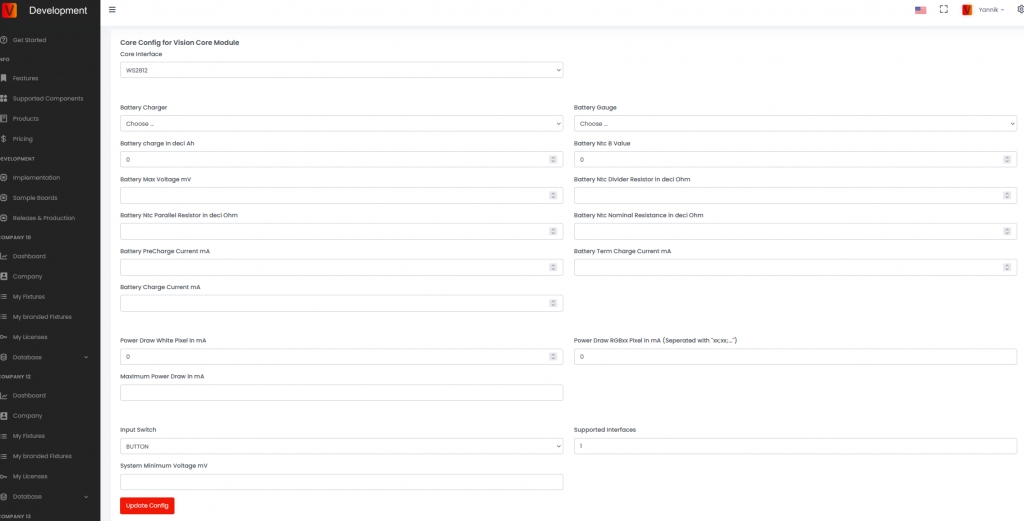
Press Button Update Config to save.