In the following you will learn how to update the Creative Config.
Update Creative Config
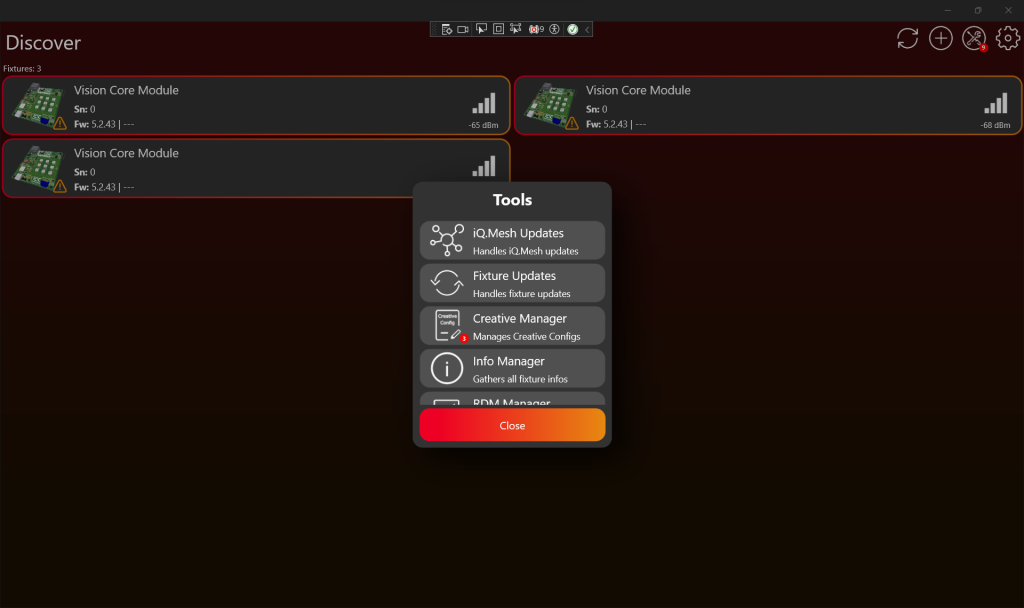
- Scan for the fixtures and the click on the Tools Icon, with the red badge, on the top. Scroll down if necessary and then click on „Creative Manager“.
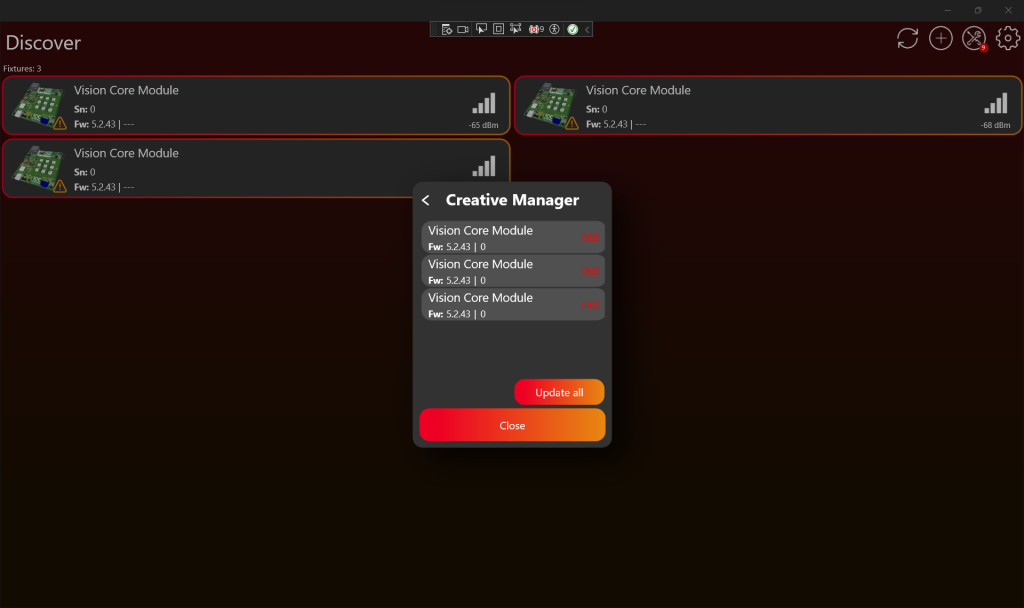
2. Then click „Update all“. After a successful update, the creative configuration is updated, and it might be necessary to restart the fixture for the changes to apply.
VISION Bootloader Flash File Generation – optional
The VISION Bootloader Flash File Generation is an optional tool to optimize production steps. This tool enables you to generate the bootloader firmware flash file for the VISION IC. The advantage of this file is that it includes the creative configuration, which reduces the necessary steps in the production process. Below is a step-by-step guide:
- Activate Test Mode.
- Go to „Settings“ by clicking on the gear in the top:

- Click on App Settings:

- Tab on the App Software Version label (0.0.5.0) two times. After that a prompt shows up. Type in the PIN “7248“. Then the Test Mode will be activated.
.
- Go back to the “Discover“ page.
- Go to „Settings“ by clicking on the gear in the top:
- Navigate from the Discover page to Settings by clicking on the gear in the top:

- Click on Developer Tools:

- Click on VISION Bootloader Flash File Generator:

- Select the VISION IC of the fixture:

- First, choose your module type (External Module, Core Module, or V Adapter)
- Then, select the specific IC.
- Select the fixture:

- Additional optional settings are “Activate high voltage mode” and “custom settings”. These settings are optional and not required:

- Generate the VISION bootloader flash file by clicking the button:

- Save the generated file.
- Flash the bootloader file onto the VISION IC using a J-Link.